10 Things To Do After You Have Bought A Paddleboard
As many of you know, for the last year I’ve been working in my local SUP shop. I have absolutely adored this job as I love meeting new people, chatting to people about SUP adventures and basically surrounding myself with all my favourite things!!

Today (which happens to be my last day in the shop!) I had a wonderful customer come in to buy an inflatable SUP. He had already pre-ordered so he was just coming to pick it up and pay. As we processed his order and I wished him many wonderful SUP adventures ahead he stopped in his tracks…
“…any advice on where to go to work out how to do all this stuff?” he said.
“Stuff?” I asked, “…like information about inflatable paddleboards?”
“Like… Everything?” he replied.
And I realised… yes, what is next? Hit the water? Read the instruction manual? Head to YouTube? I’m sure lots of new paddlers are probably paralysed with thoughts and questions once they’ve bought their board and unsure where to go or what to do first.
So inspired by the chats I had with my customer today, here are my 10 things to do after you have bought a paddleboard - imagine this being the IKEA guide for commencing your paddle adventures…
1. Register for your warranty or explore your warranty situation
If you’re buying your board from a well-known surf/SUP brand, the majority of them come with a warranty and encourage you to register your board online after purchase to register for your warranty. While most brands will probably help you out within your warranty period whether you have registered online or not, I always think it’s a good idea to register just so they have your details and date of when you bought your board, should you lose your receipt or anything comes up.
Additionally, if it’s not apparent whether your board has a warranty, use this first initial moment to find out. Ask the retailer before you leave the store, or send them a quick email to find out. It’s best to know now rather than down the track when you have an issue.
The majority of boards will have a code on them (like the one shown here). Perhaps take a photo of this before it fades in the sun as you may need this for any warranty claims.

Here’s an example of the code of a Red Paddle Co board - this is often the information you need to register your board for warranty or to do a warranty claim.
2. Get to know your board - be curious
Sounds simple but take a tour of your board once home and be really curious. Where do you attach your leg rope? (Hint: probably a D-ring at the back of the board) Which end is the back? (Hint: the end with the fins) Which little spots are going to be the areas you’ll really have to clean thoroughly after use as sand is likely to get stuck? (Hint: around D-rings and handles)

Here is an example of a D-ring at the back of a board where you’d attach your leg rope.
3. Get to know the wind forecasting apps
You may leave the shop SUPER EXCITED to test out your board and desperate to hit the water, but it would be pretty rubbish if your first SUP experience wasn’t a great one. So whether you head home or straight to the beach, take a moment to get to know your wind forecasting apps and what they mean for you as a paddler. Check out this blog post that I wrote recently about how to read the wind forecast before you SUP. My app recommendations for Australia are ‘Windy’ (the blue icon version not red), Seabreeze and Willyweather, but there are lots more! Check out the blog linked above for my full break-down of how to read the wind on these apps.
4. Secure your fins
This may be something you want the retailer to help you with before you leave the store, but it’s pretty easy to do yourself, so don’t panic if you find yourself doing it at home… there’s always Mr. Google or Mrs. YouTube to help you out if you get stuck! Putting in fins is normally super easy, you may have a ‘click-and-go’ style fin box, a screw-in fin (or fins) that needs a fin key (shown below), or a large central fin that uses a screw and bolt style system (shown below the fin key below).
Note: if you haven’t got one of these fin keys but it looks like you need one, any local surf or SUP store should have them. These fin keys are universal for SUP and surf.
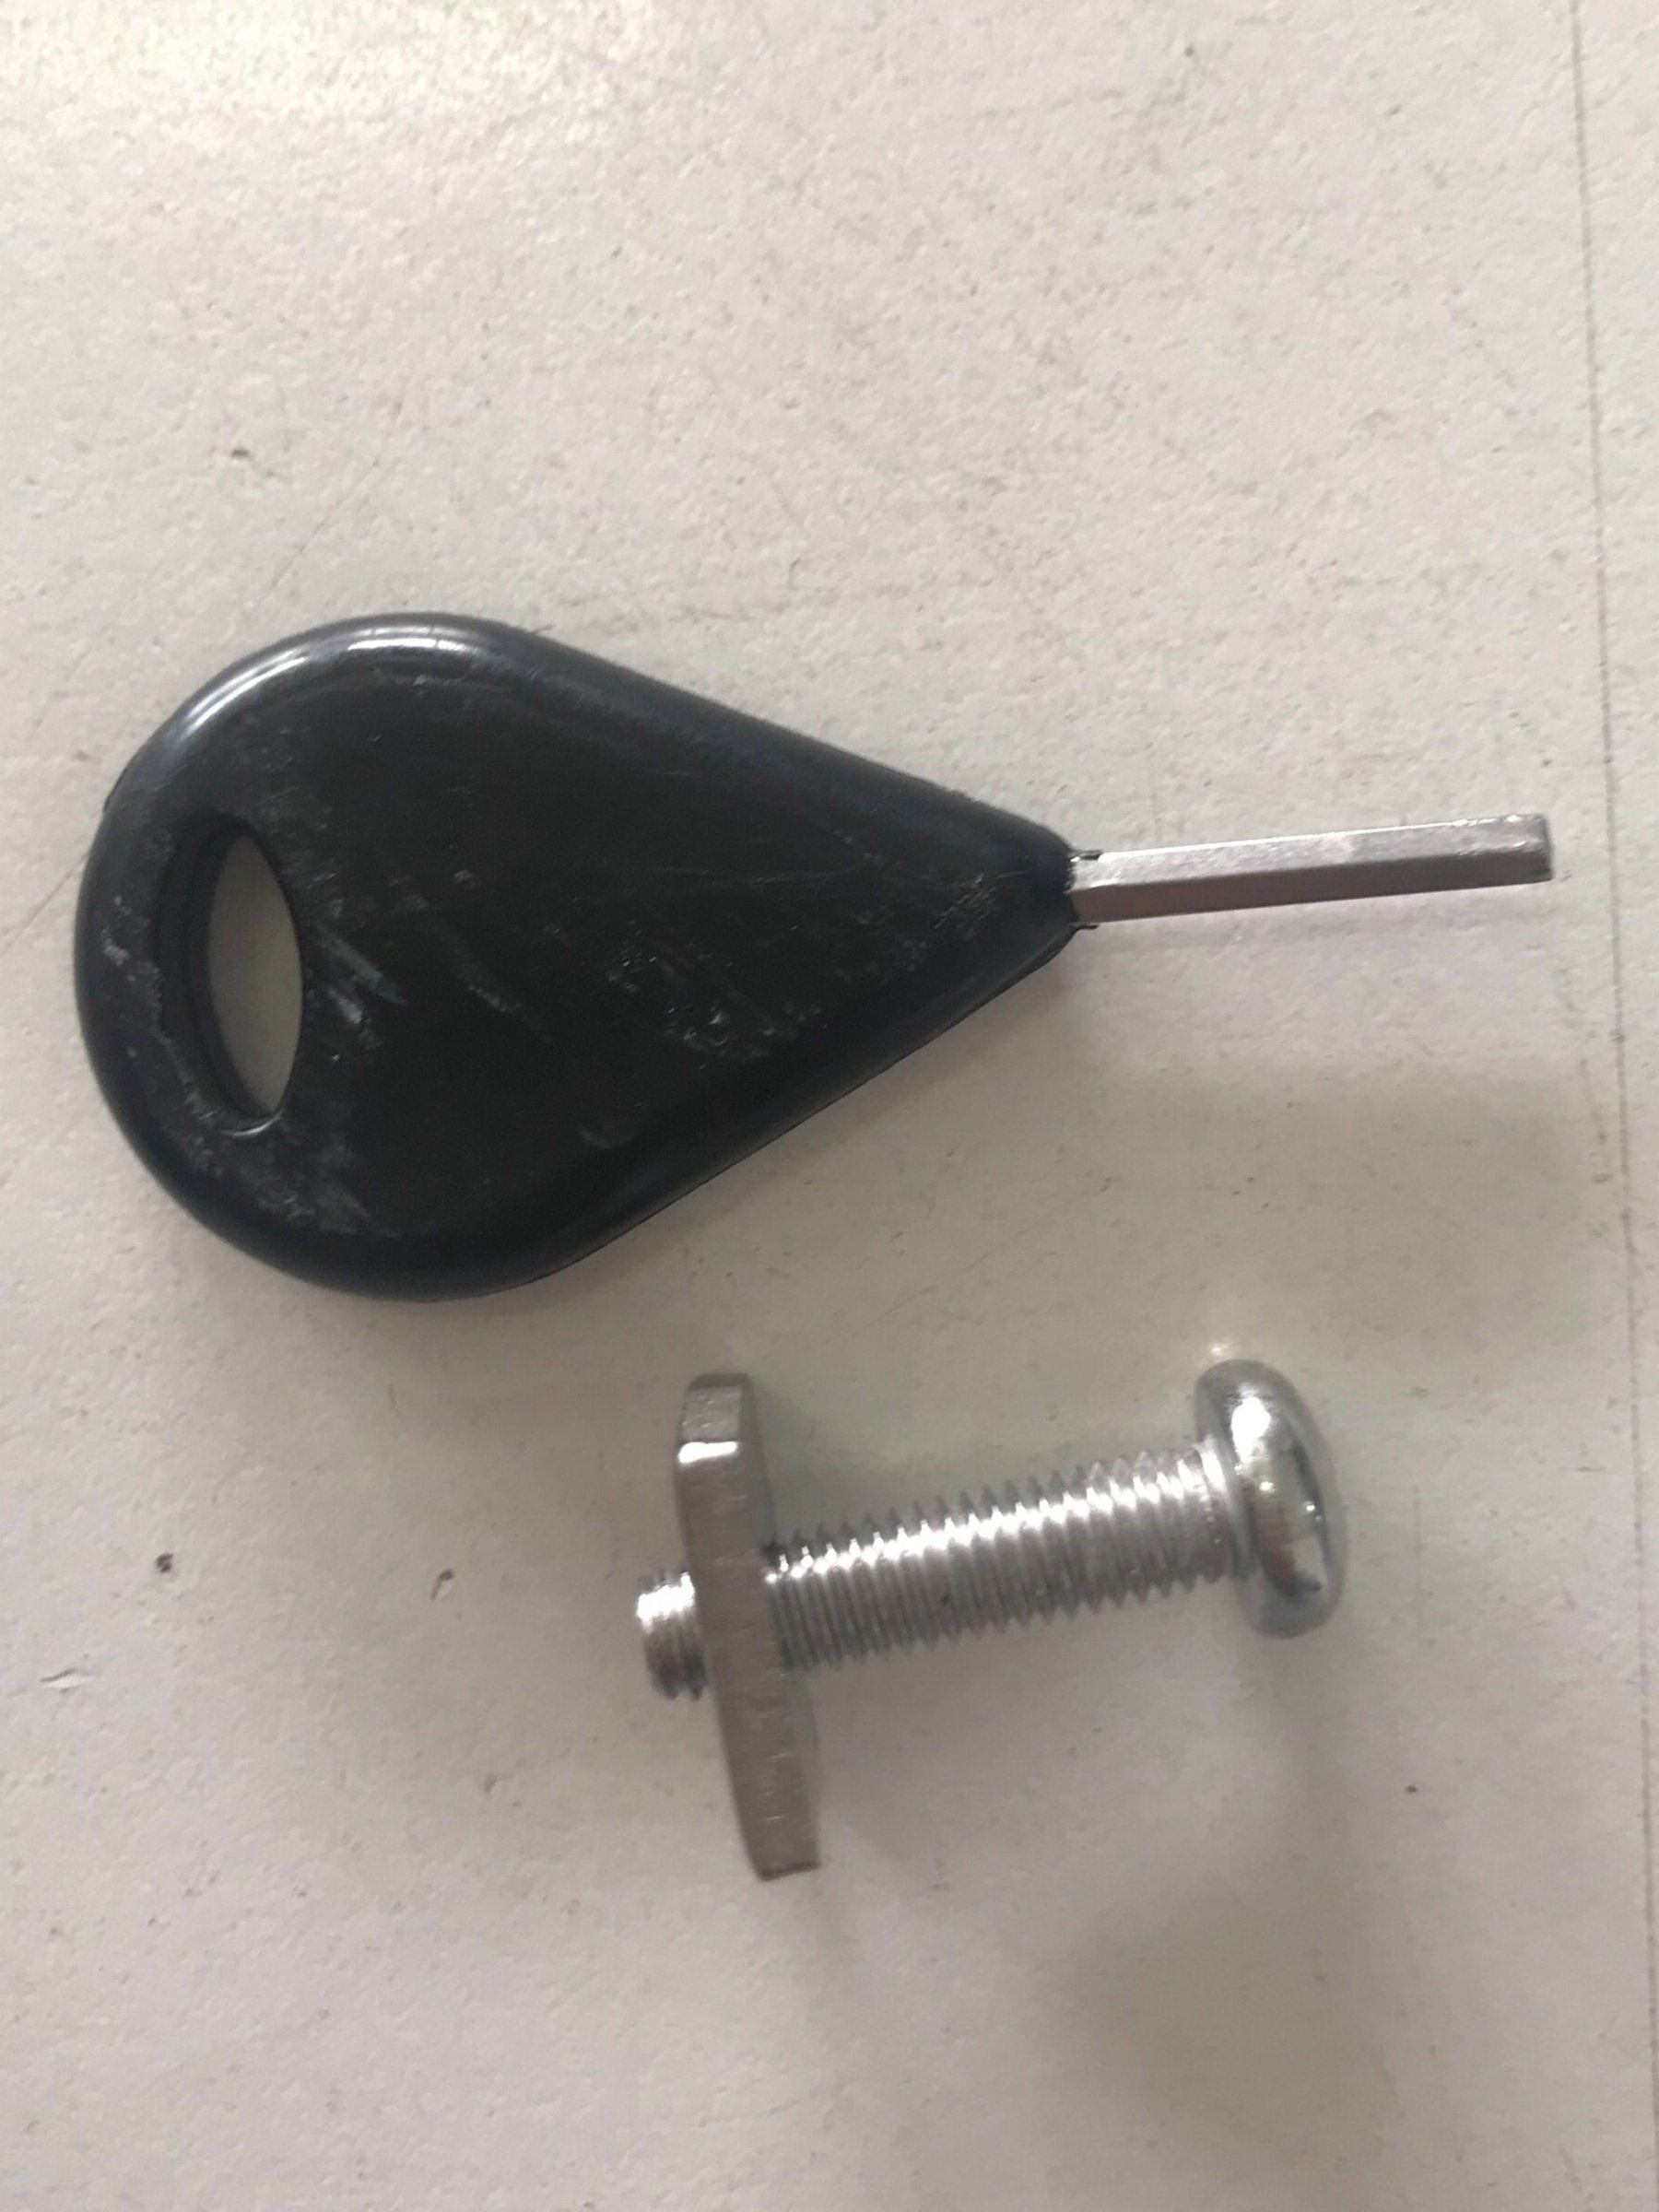
Fin key often used for smaller fins, e.g. side fins.
Screw and bolt needed for one large central fin on a SUP. All SUPs are different and have different fins so don’t panic if you don’t have one of these - you may not need it.
5. If it’s an inflatable SUP - what’s the max PSI it will take? In fact… what is PSI?!
PSI stands for pound per square inch or, more accurately, pound-force per square inch. It is is a unit of pressure or of stress based on avoirdupois units. It is the pressure resulting from a force of one pound-force applied to an area of one square inch… woah.
To us paddlers, the PSI recommendation is the recommended amount of air pressure we put in the board to make it stable and stiff enough to stand on and ultimately paddle.
Typically most inflatable SUPs paddle at around 15-16 PSI. When you first get your board, it’s vitally important to find out whether your iSUP has a max PSI. Some have a max of 22 PSI which means you don’t have to worry, you’ll probably never over-inflate your SUP, and it has room to expand if left in the sun or a heated environment. However, if your board says ‘MAX 15 PSI’ then take note of this as this will mean that you don’t want to put any more pressure on your board by leaving in the sun for long periods of time, or over pumping.

As an example, this board recommends 15-18 psi - but each inflatable will be different.
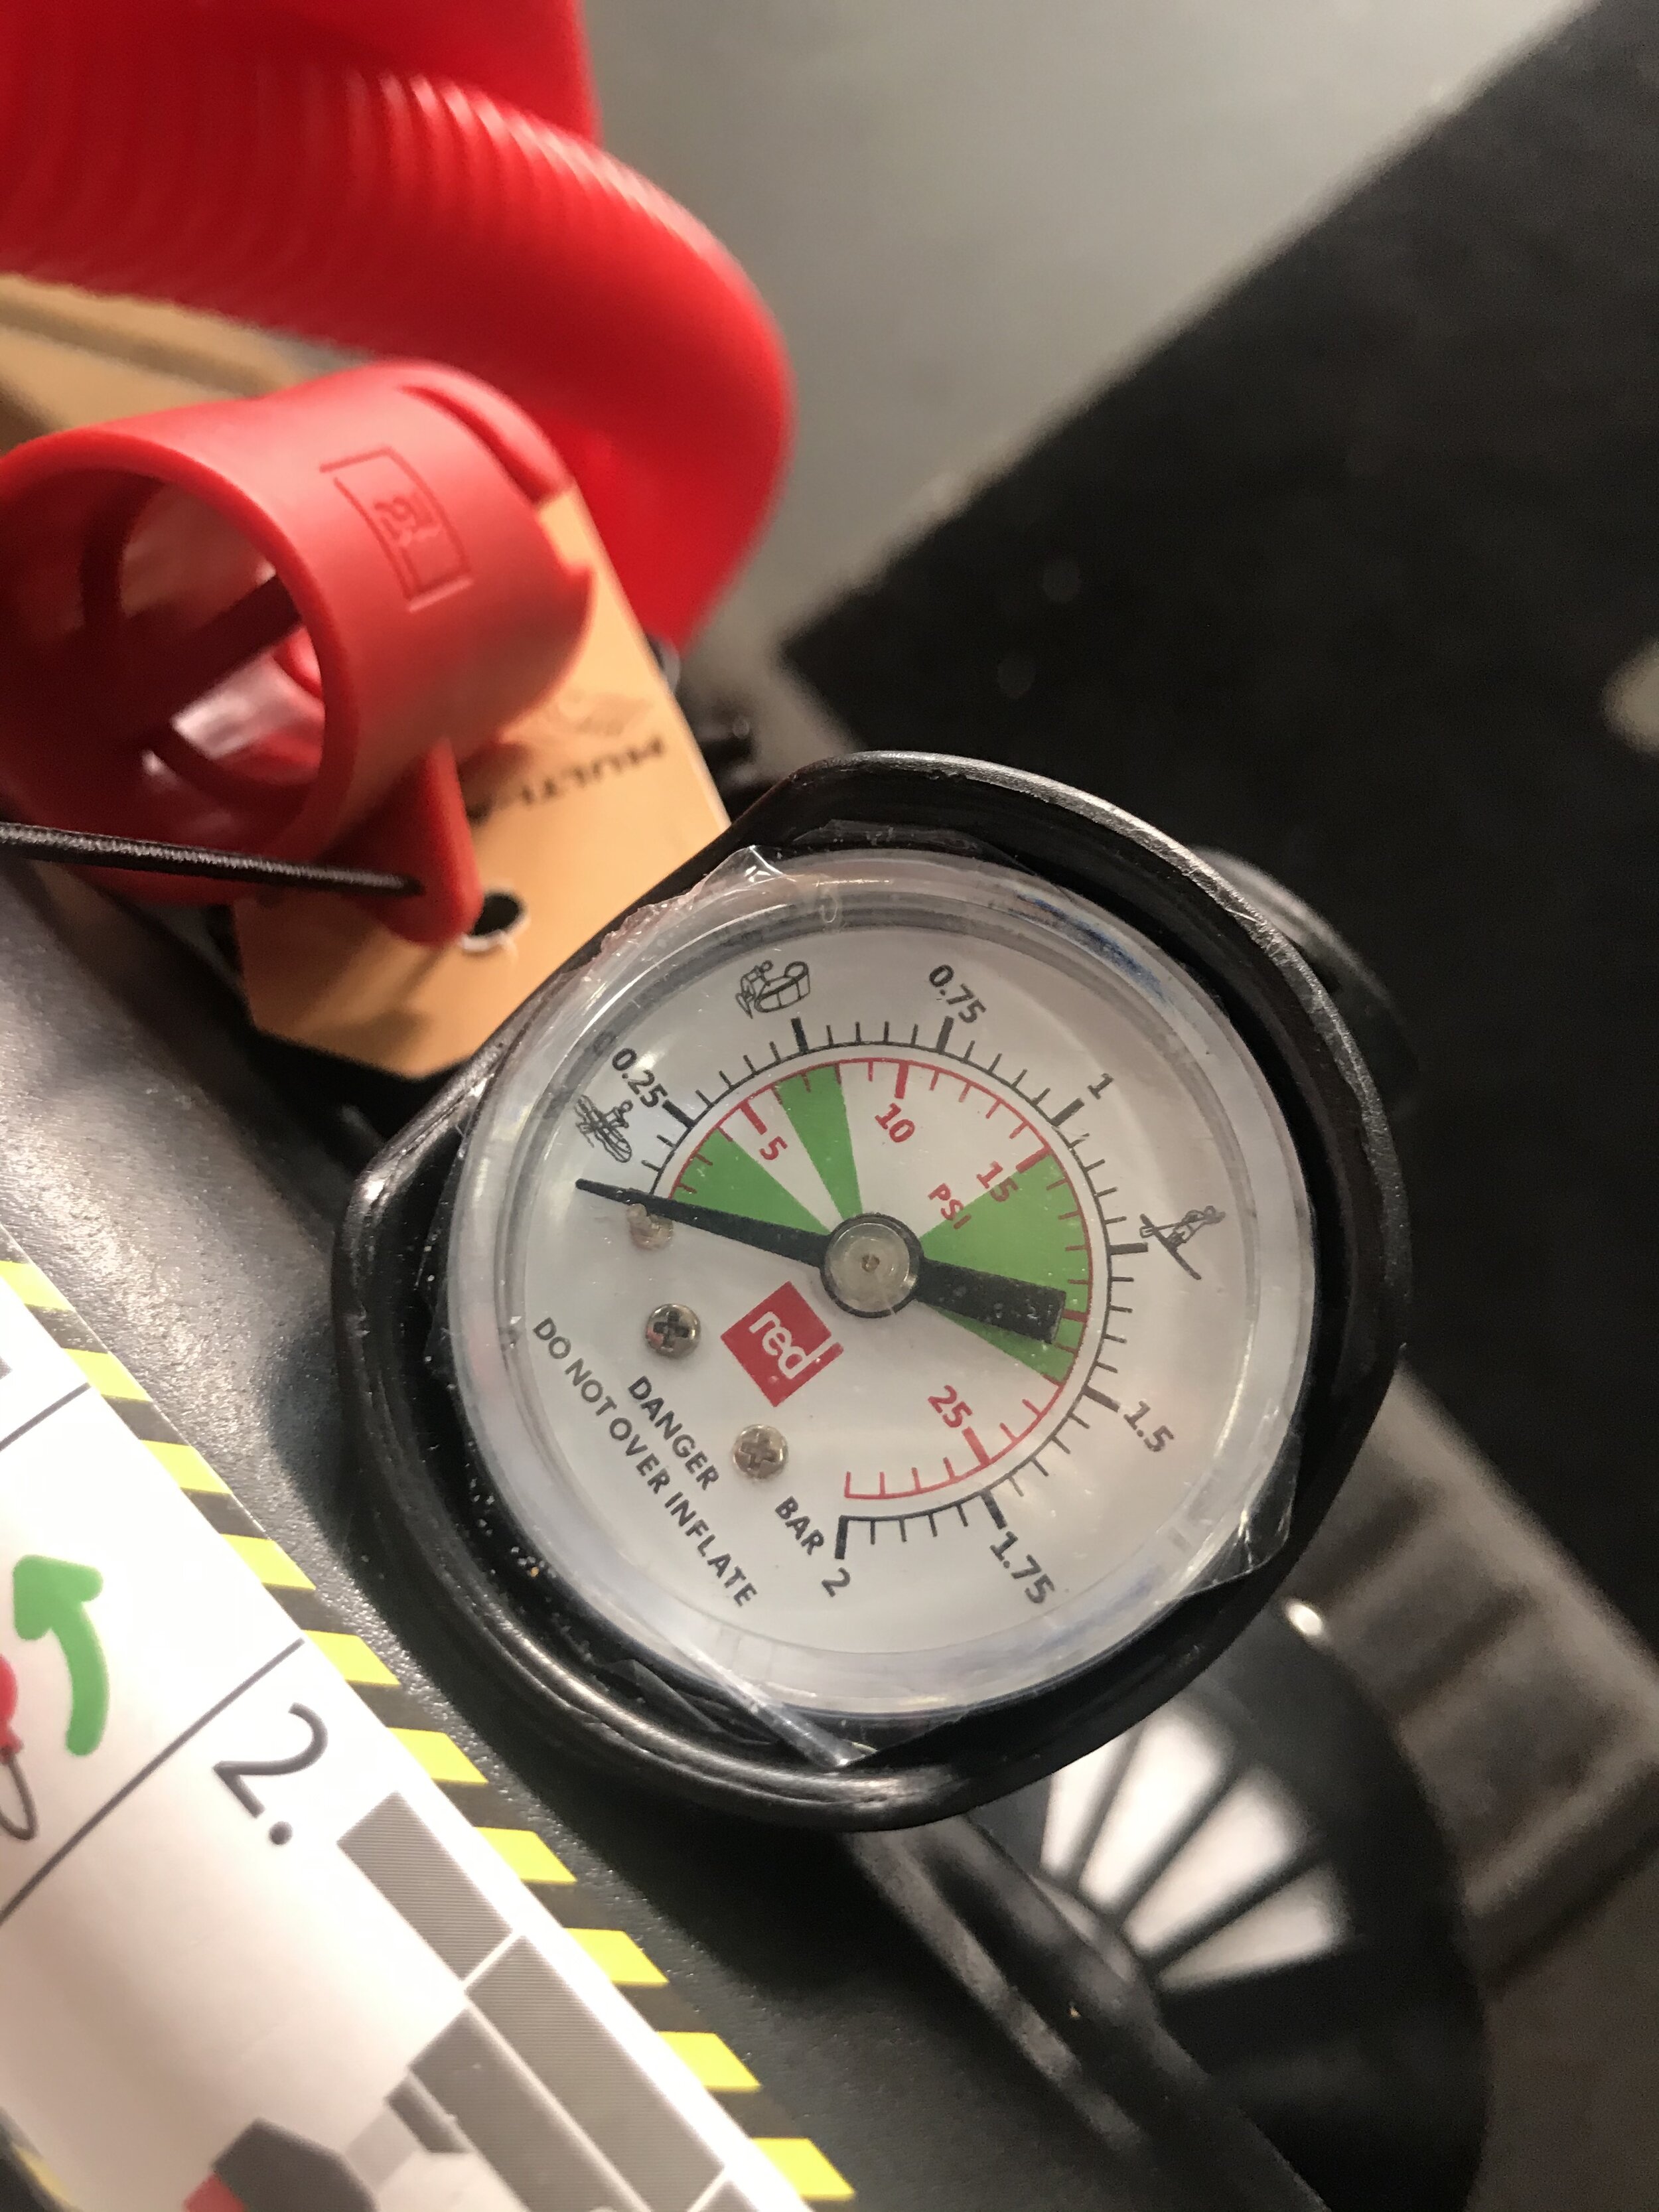
This is an example of a Red Paddle Co pump. The PSI reading is shown in red. You’re aiming to pump to 15PSI so inside of the third green section.
And while we are talking about inflating boards… explore the valve!! The valve is such an important part of your inflatable SUP - and in particular, check out the pin. When you inflate the paddleboard the pin needs to be UP. This means that air can go in when you pump but none will go out. Then when you deflate the pin is down.
The wwwooorrrstttt thing for an iSUP paddler is when you spend 10 minutes hand pumping a board to then find as soon as you take the pump nozzle off the valve, the valve explodes with air and leaks all of air that you have just spent 10 minutes putting into your board! GAH! DISASTER!! This is why the pin is so important…. don’t forget… pin up before you pump!
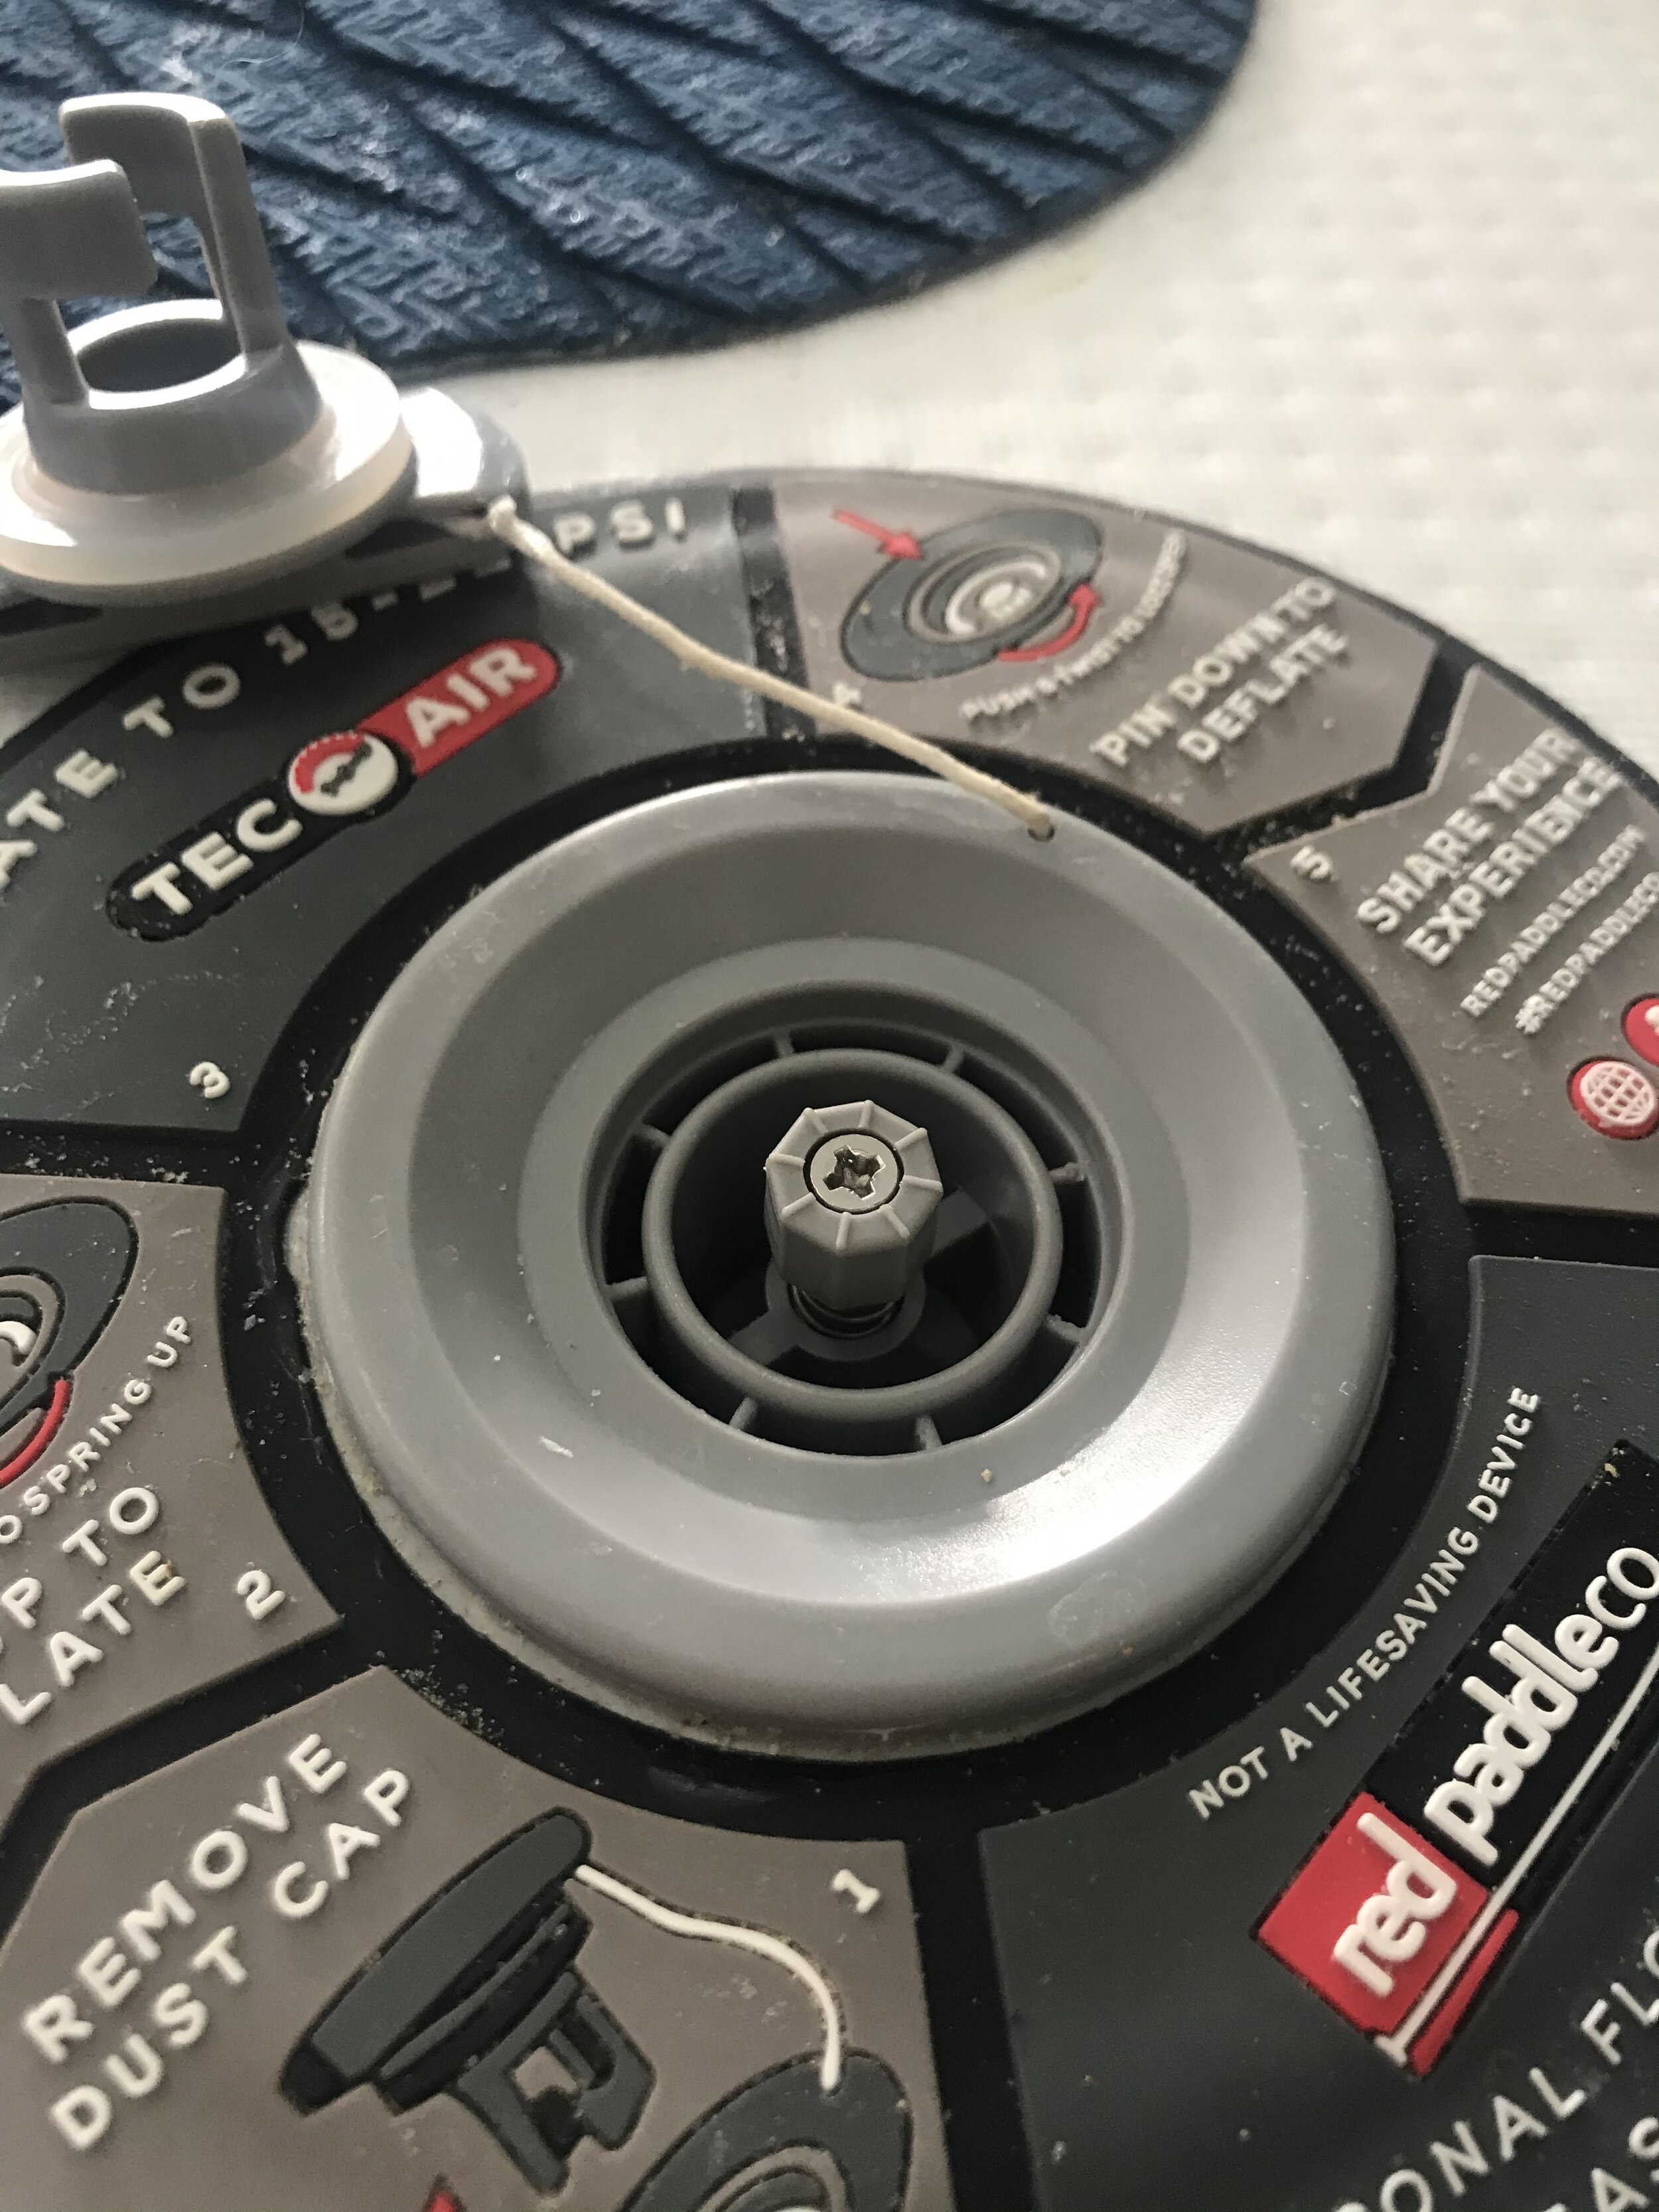
This is your valve, and in the centre there is the pin. Twist the pin and push to deflate your board. Twist the pin and pull gently upwards to ensure it is UP for inflating.
6. Try out the roof racks
If you have a friend handy, go grab them.
Putting a board on the roof of your car for the first time can be daunting, so use a friend for the first go, and then once you have an idea of placement and the weight of the board, you’ll feel more comfortable attempting it yourself.
I have been meaning to do a YouTube video about tying down paddleboards onto roof racks for ages (and I promise it will come soon!), but in the meantime, there are PLENTY of videos to explore on YouTube. Remember to focus on having your board central to your car, and use decent tie-down straps to look after your board on your journeys. The easiest ones to use are the straps with buckles and a silicone cam cover (like the ones pictured below). These wonderful straps will enable you to tightly secure your board without having to play boy scout and tie a million knots!

It’s also at this point where some people realise that their car won’t fit in the garage with the board on the roof - not a big issue, but working this out now means that you avoid any potential injuries to the board or garage door in future. Additionally, I tend to stay away from underground car parks when I have my board on the roof - but of course, all underground car parks vary.
7. Where to go? Hit up google maps or ask your local paddle community
There are so many incredible paddle locations out there to explore. In fact, owning a paddleboard will enable you to uncover so many incredible locations you never knew existed!
When trying out a new board, especially if you’re new to paddling, it’s best to play it safe with your first location. Stick to sheltered waterways or local bays where there will be others present in case you need any help.
If you’re part of the She SUPs Community - post a question in the group asking for tips or recommendations. Make use of the knowledge of others in the SUP community, we’re a friendly bunch and our number one love is sharing stories of our SUP adventures.
Additionally, old mate Google is always a gem when it comes to finding paddle spots. Use google to find a local waterway near you and explore whether there is a public boat ramp nearby. If there is a public boat ramp, you can probably paddle it. Of course, asking your local paddling community, forums online or a local SUP/Kayak school will enable you to gain more information about the environment such as how it’s impacted by tides, potential currents or the best times of day to go.
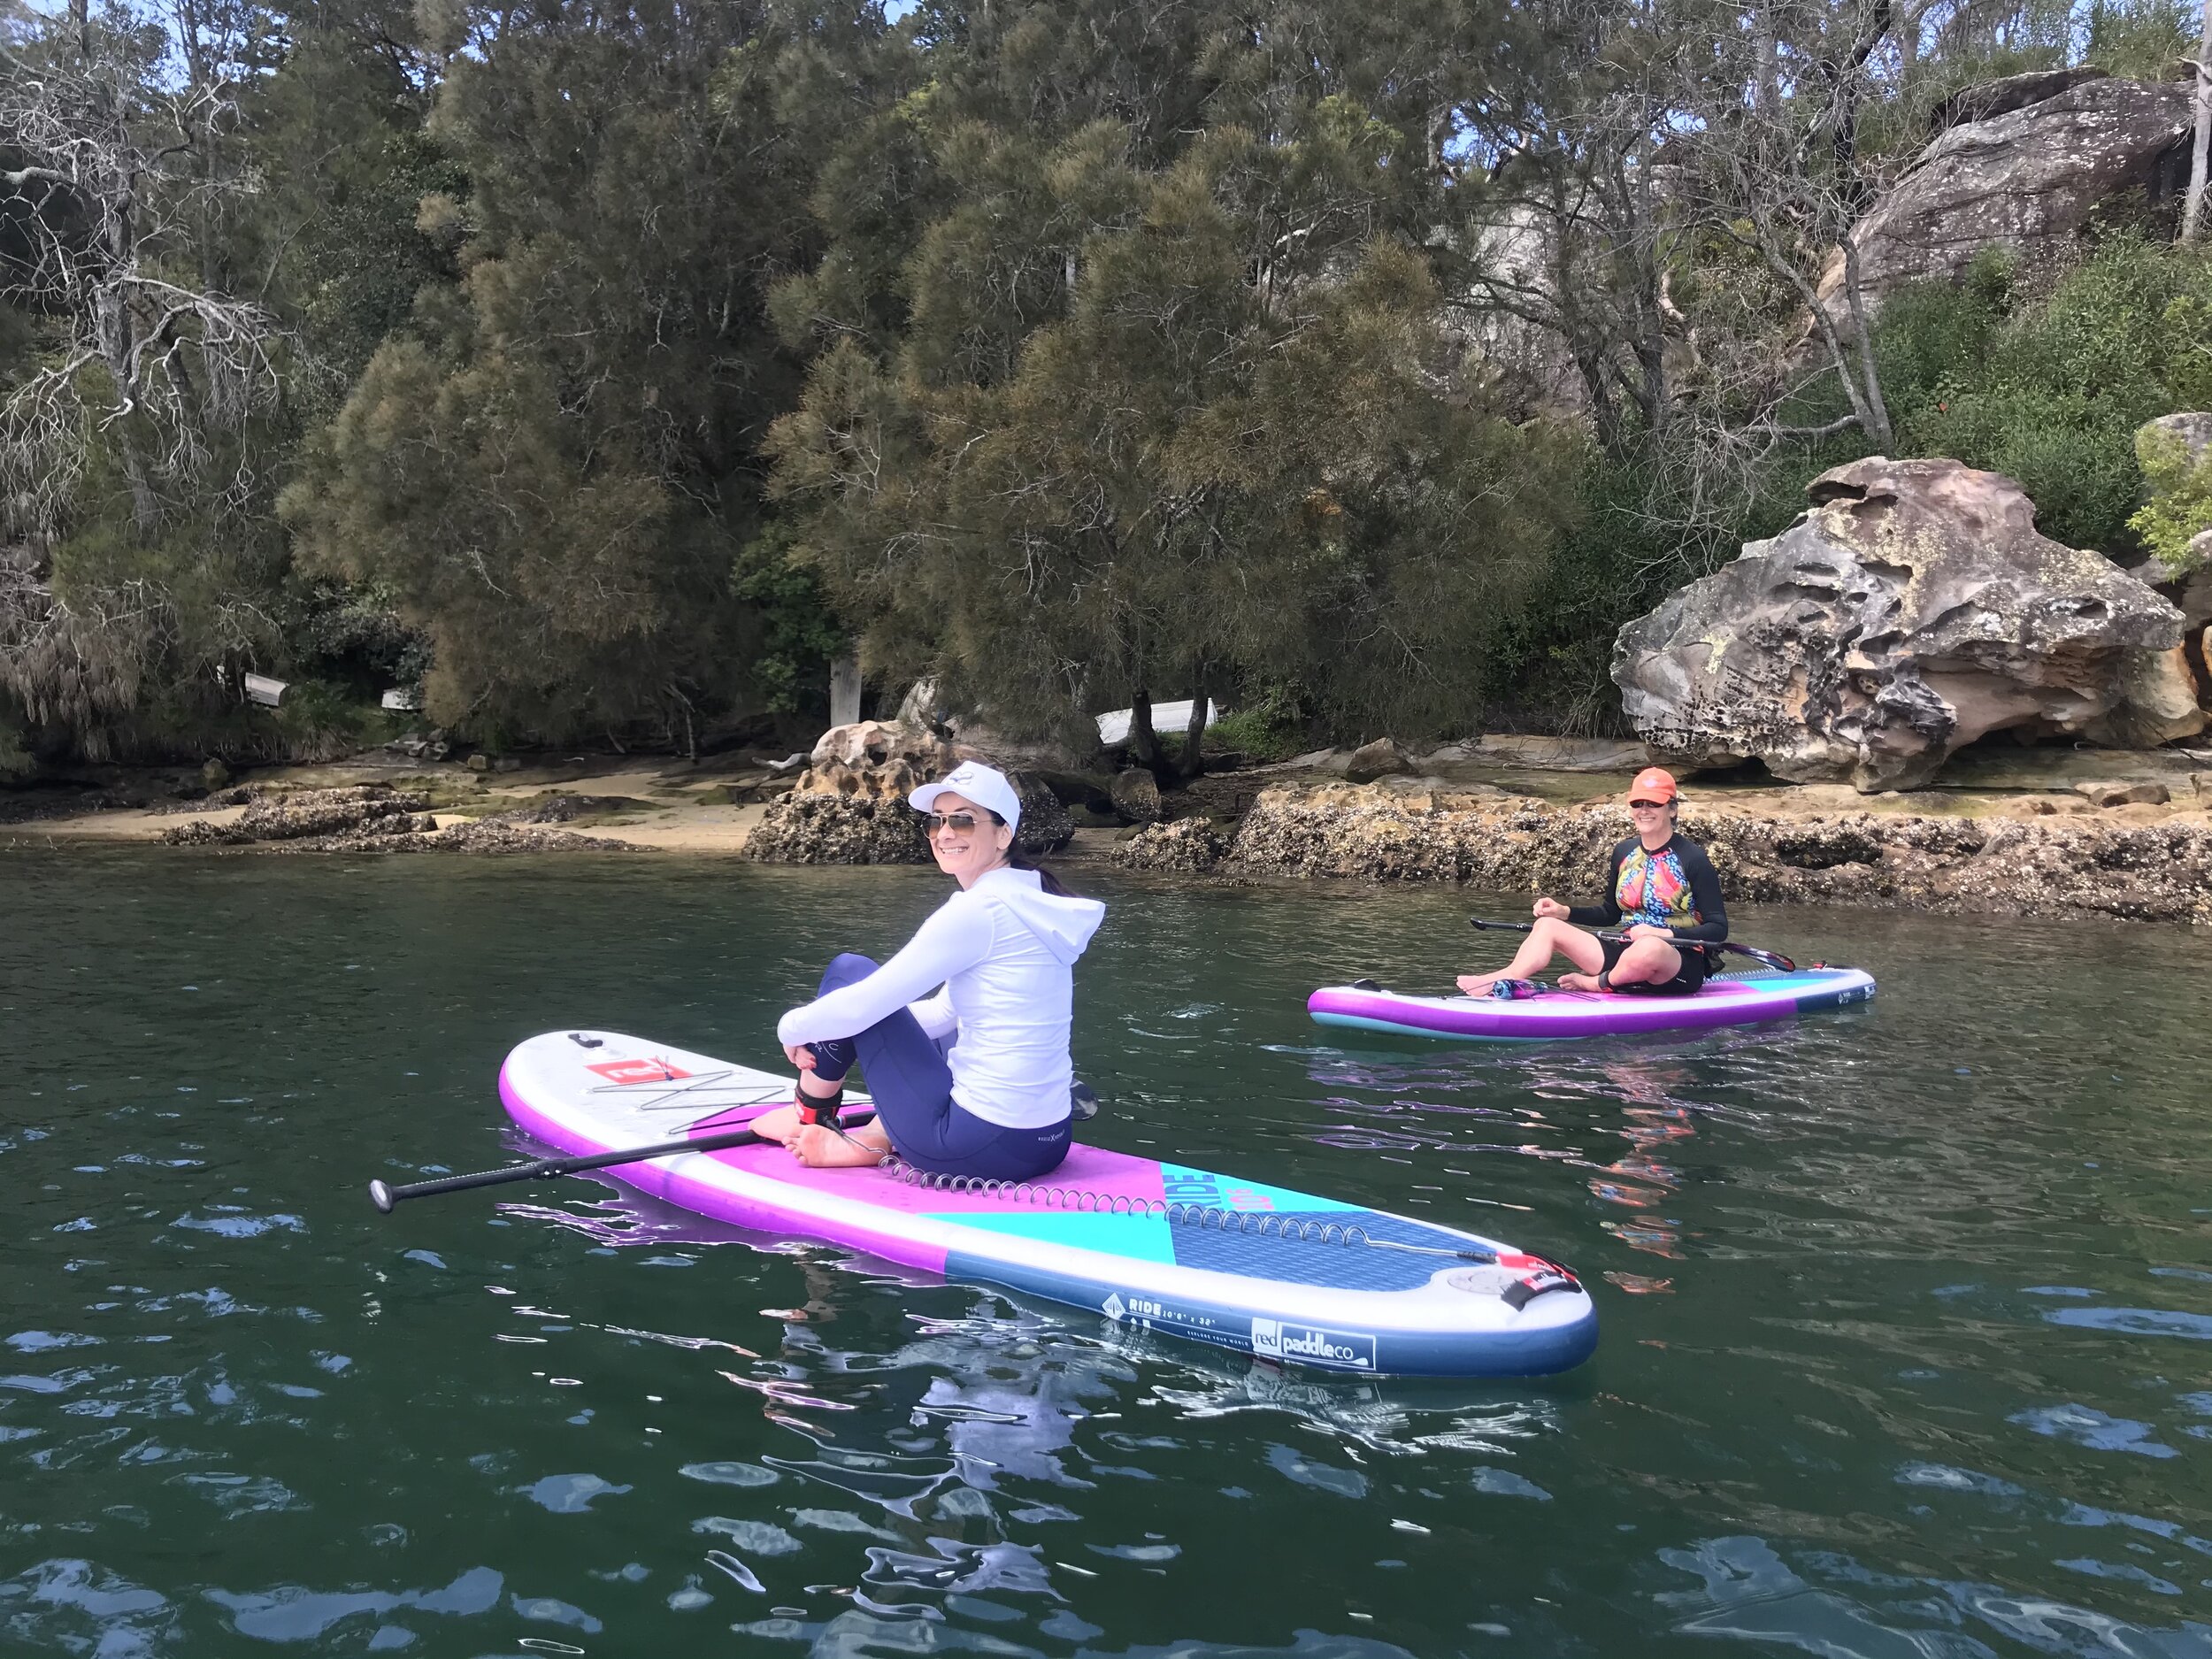
8. Grab a group of friends and go test out your board!
When you attempt something for the first time does anyone else get the feeling that EVERYONE is watching you?? I certainly do. I remember that feeling when I purchased my first paddle board and took it out for it’s first paddle. I was VERY self conscious.
So grab a group of friends or your family and test out your board in great company. A trick to SUP balance and paddling a SUP with confidence is being relaxed. If you’re tense, you’re likely to fall at any little ripple hitting the board, but if you’re relaxed with friends, you’ll be standing with ease and have a heap of fun in the process!
9. Wash it for the first time - get into good habits!
You’ve just invested a decent amount of money into this board, and therefore you want to look after it. Get into the good habit of washing your board and paddle after every use. If you have a 3-piece of 2-piece adjustable paddle, I highly recommend breaking it down into its 2 or 3 pieces and washing each section so that salt doesn’t clog in the joints.
If you have an inflatable board, once it’s washed make sure you dry it before you deflate and roll up into the bag. To roll the paddle board, deflate via the valve, push the air out and then roll up (starting from the nose of the board) just like you would a sleeping bag. Brand new boards are often harder to roll, but don’t worry - it will soften with time.
10. Celebrate and plan more trips!!
Yeyyyy you did it!! Did it feel amazing? I bet it did.
This is only the beginning of the most amazing relation’SUP… see what I did there? ;)
As you and your board get more comfortable with each other, you’ll find yourself pushing yourself and the board further, trying new locations, attempting new skills. Good quality paddleboards that are looked after can have a lifespan of between 5-10 years, so get ready to create some amazing memories.
A huge thank you to my wonderful customer who inspired this blog post. I hope I covered all of the above in our chat in the shop, but if not - I hope you find yourself here on my blog!
See you on the water!
Vikki x